In order to no longer get the message that your certificate is invalid (SelfSigned Certificate made during installation) when connecting to the ProxMox Virtual Environment (PVE), a certificate from an official instance is required.
The one used here is Let’s Encrypt as the certificates are free and can be automated.
The automation can be done either by posting a special webpage (HTTP) on a website corresponding to the domain for which you want to have a certificate. This is not the method used here as this requires a website accessible from the internet.
The other method is where Let’s Encrypt wants you to show control over a domain name by creating a DNS-record with a special content. This does not require a website on the internet. This will be the method used here. Once control is shown the certificate will be created. All of this is done by the “Automatic Certificate Management Environment” (ACME) of Let’s Encrypt
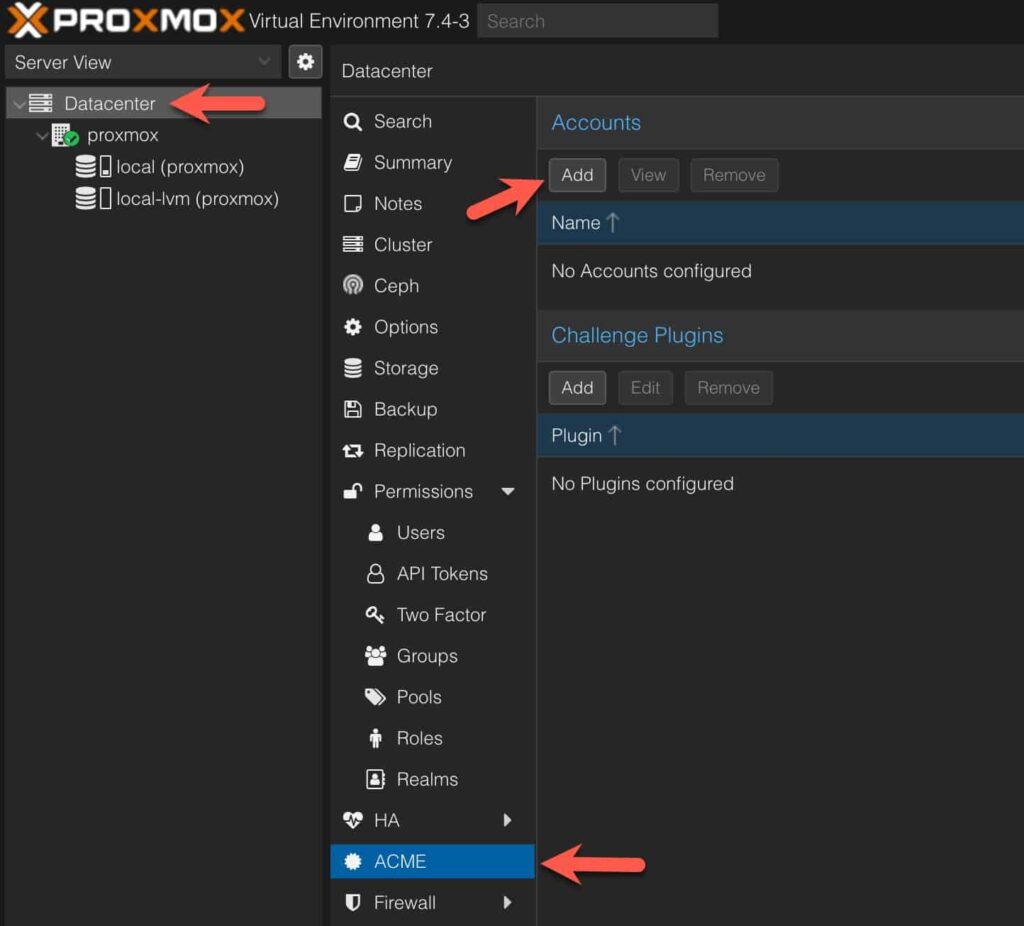
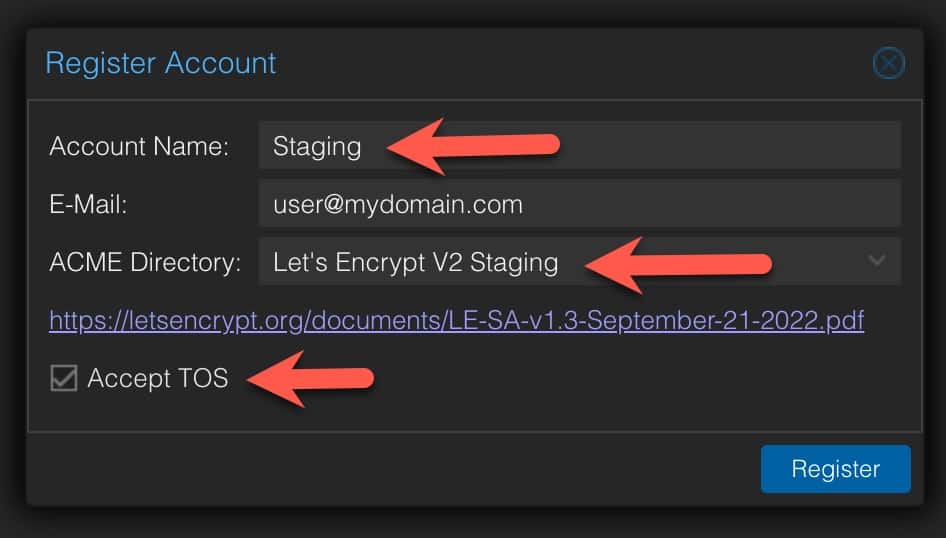
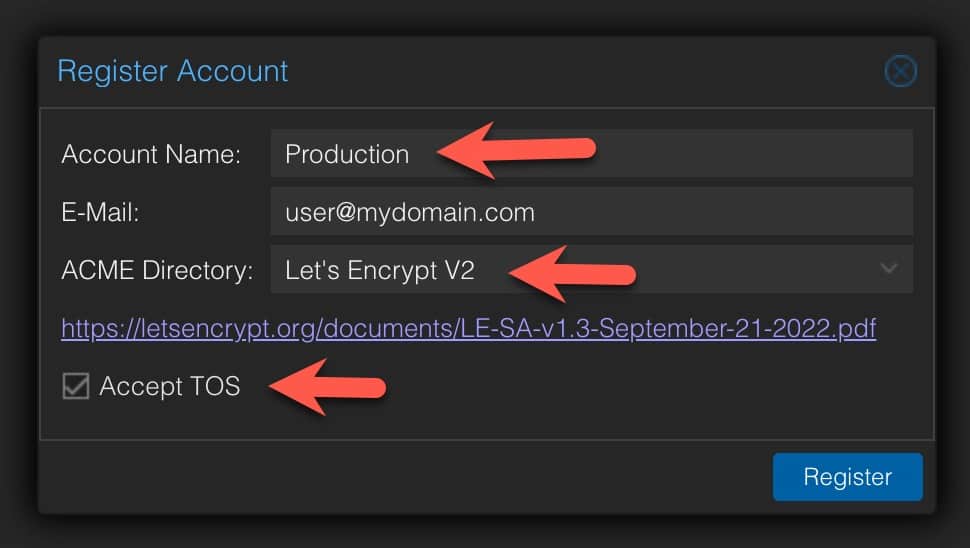
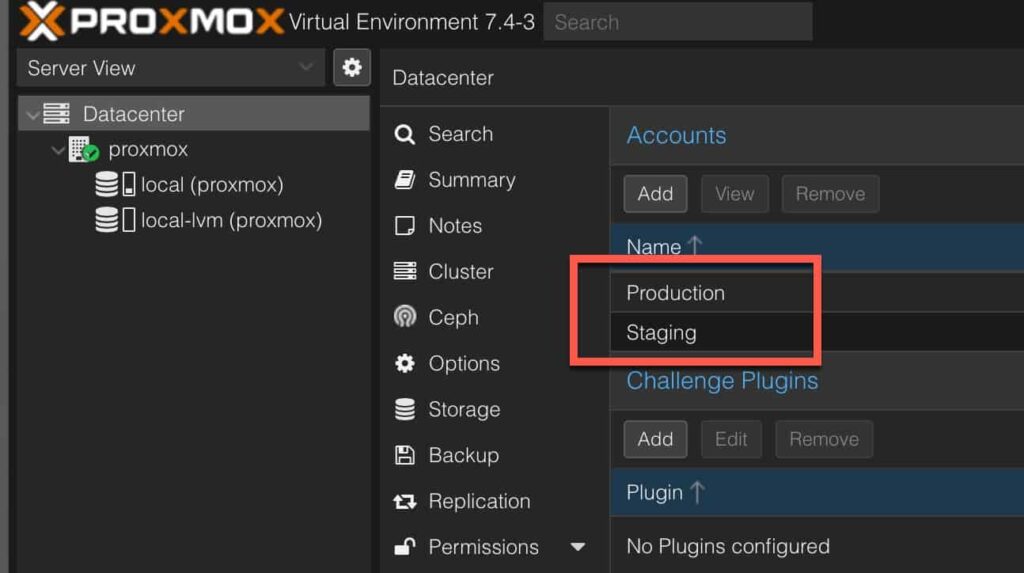
- Create 2 Accounts for ACME : Staging (test) and Production
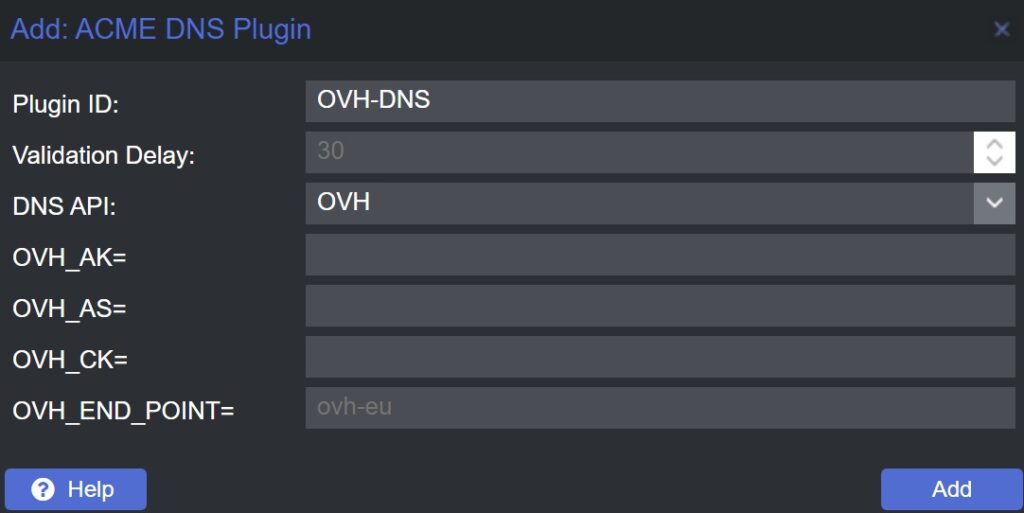
Connect to the Proxmox Machine ->DataCenter -> ACME -> Add Account
2. My DNS-Provider is OVH and they have a DNS-plugin for the ACME process. You will need an Application Key (OVH_AK) and Application Secret (OVH_AS) and if this is a new one, it will also need to be authorized. Which will result in a customer key (OVH_CK). The endpoint in my case is ovh-eu. If you already have these keys (Token), you can fill this in here and proceed to step 4. Be warned though: it is best (for security reasons) to have a Token limited to only DNS-Control of your domain. Don’t use one for your entire OVH-Account.
3. In order to get an API Key from OVH. You can follow the documentation at
https://github.com/acmesh-official/acme.sh/wiki/How-to-use-OVH-domain-api
In short you will ask for a token limited to your domain.
https://api.ovh.com/createToken/?GET=/domain/zone/mydomain.com/&POST=/domain/zone/mydomain.com/&PUT=/domain/zone/mydomain.com/&GET=/domain/zone/mydomain.com&DELETE=/domain/zone/mydomain.com/record/This will give you something similar to below. You will need to login to your OVH-account if you weren’t already.
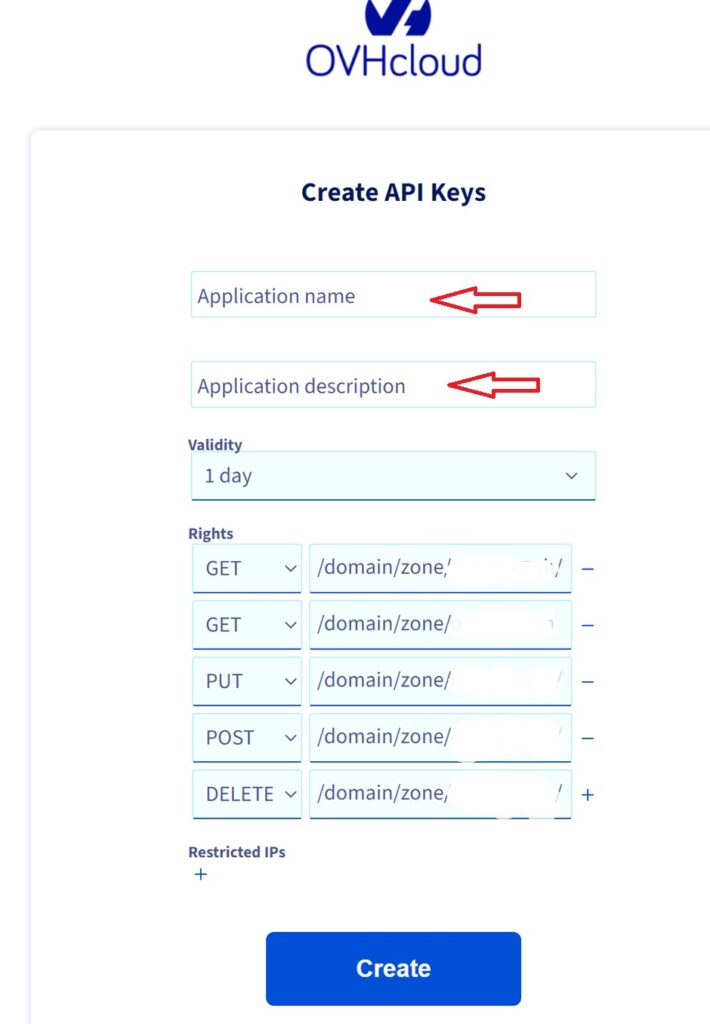
Once given a proper name and description, change the validity to unlimited and Create the Key. For obvious reasons, I will not show the resulting keys here.
You can now fill in the Application Key, Application Secret and Endpoint. The Customer Key is still missing. But this will be adapted later.
4. You can now go order your Certificates.
Connect to your Proxmox System and select Certificates.

Make sure Staging is selected and applied and click on Order Certificates Now.
If you used an API key that was already approved then it should simply work and you will get a message similar to this ending in
All domains validated!
Creating CSR
Checking order status
Order is ready, finalizing order
valid!
Downloading certificate
Setting pveproxy certificate and key
Restarting pveproxy
TASK OK
If this was the first time you used this API Key you will need to authorize it. A request must be done. The following will be visible in the resulting code.
OVH consumer key is empty, Let’s get one:
Please open this link to do authentication: https://eu.api.ovh.com/auth/?credentialToken=n0Qbjm6wBdBr2KiSqIuYSEnixxxxxxxxxxxxxxxxxxxxxxxxxxxxxxxx
Here is a guide for you: https://github.com/Neilpang/acme.sh/wiki/How-to-use-OVH-domain-api
Please retry after the authentication is done.
You should simply open the link as mentioned. This should authorize it and the next run should work now.
If this works now you should have a staging certificate on your system installed. Closing your browser might be needed to make sure nothing was cached.
If all this works out, you can now change the order to Production: Apply and Order Certificates Now for production and you should have a good certificate. A new browser session might be required